Welcome to your new website!
Below, you will find custom written instructions for your WordPress website.
Note that you must click the Publish/Update/Save button when you’ve finished creating or editing anything on your website.
Failing to do so will result in any content you’ve created or changed being lost.
Create a new page
Click Pages in the side menu.
Click Add new page at the top of the screen.
At the top of your page, add a Page Title.
Under the Page Attributes on the right hand side, select which type of page Template you are creating:
Campaign page: A page with full width content and no sidebar, used for temporary campaigns.
Child page w/sidebar: A standard page that sits under a heading ie. Coaching.
Parent page w/ sidebar: A page that has a main button in the menu ie. Our Services.
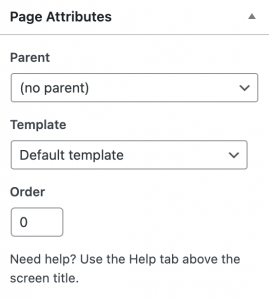
If you are creating a ‘Child page w/ sidebar’ page, you will need to select which menu item this page sits under in the Parent drop-down.
Select a Page Icon from the pre-uploaded library by pressing the + button.

Navigate to the Page Content section to begin adding content.
Under the Hero tab, you can add a feature image, a unique heading, a link and a collection of flags if you are creating a campaign page.
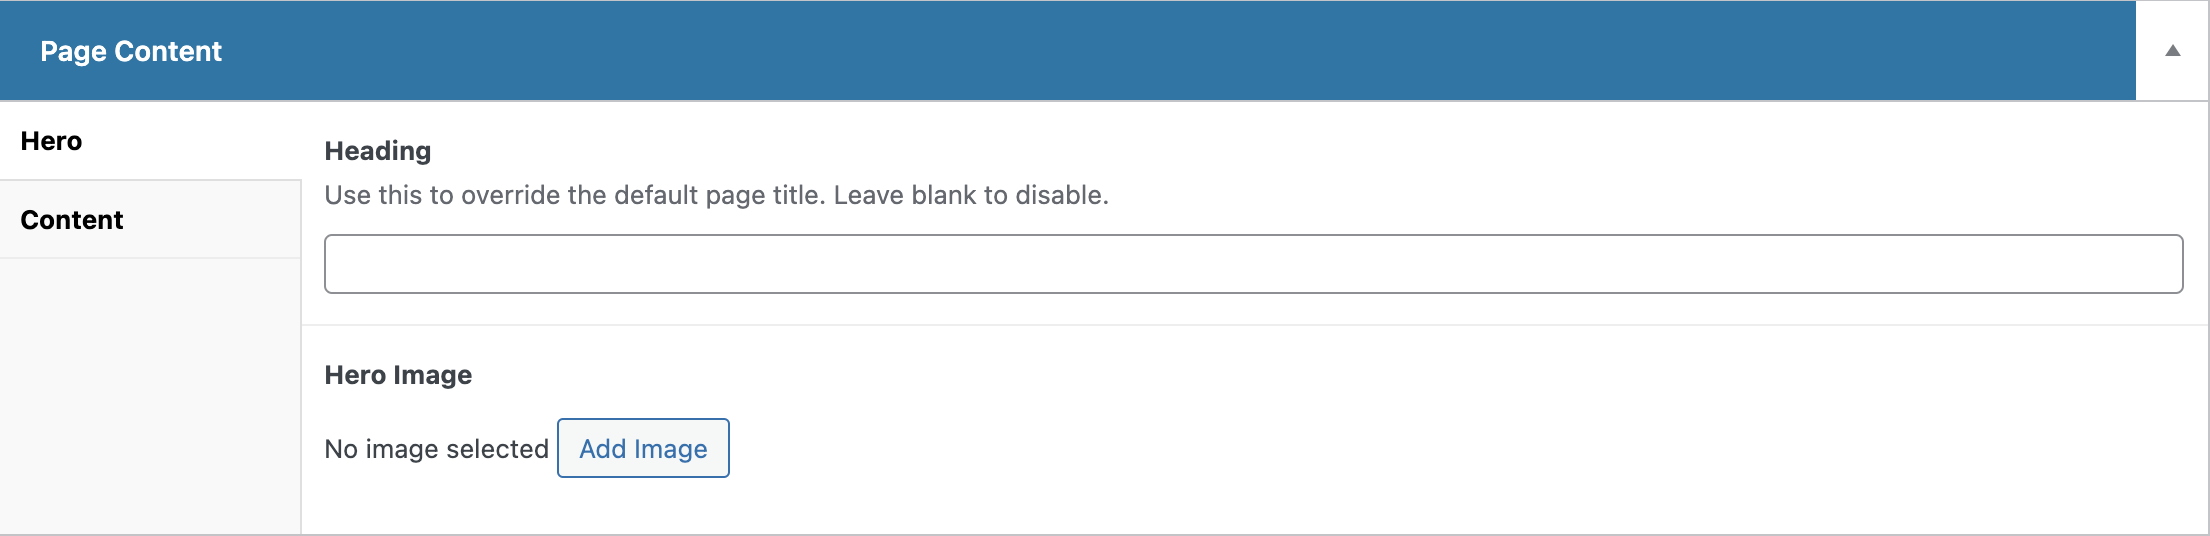
Under the Content tab, you can use the page builder to create the content within your page.

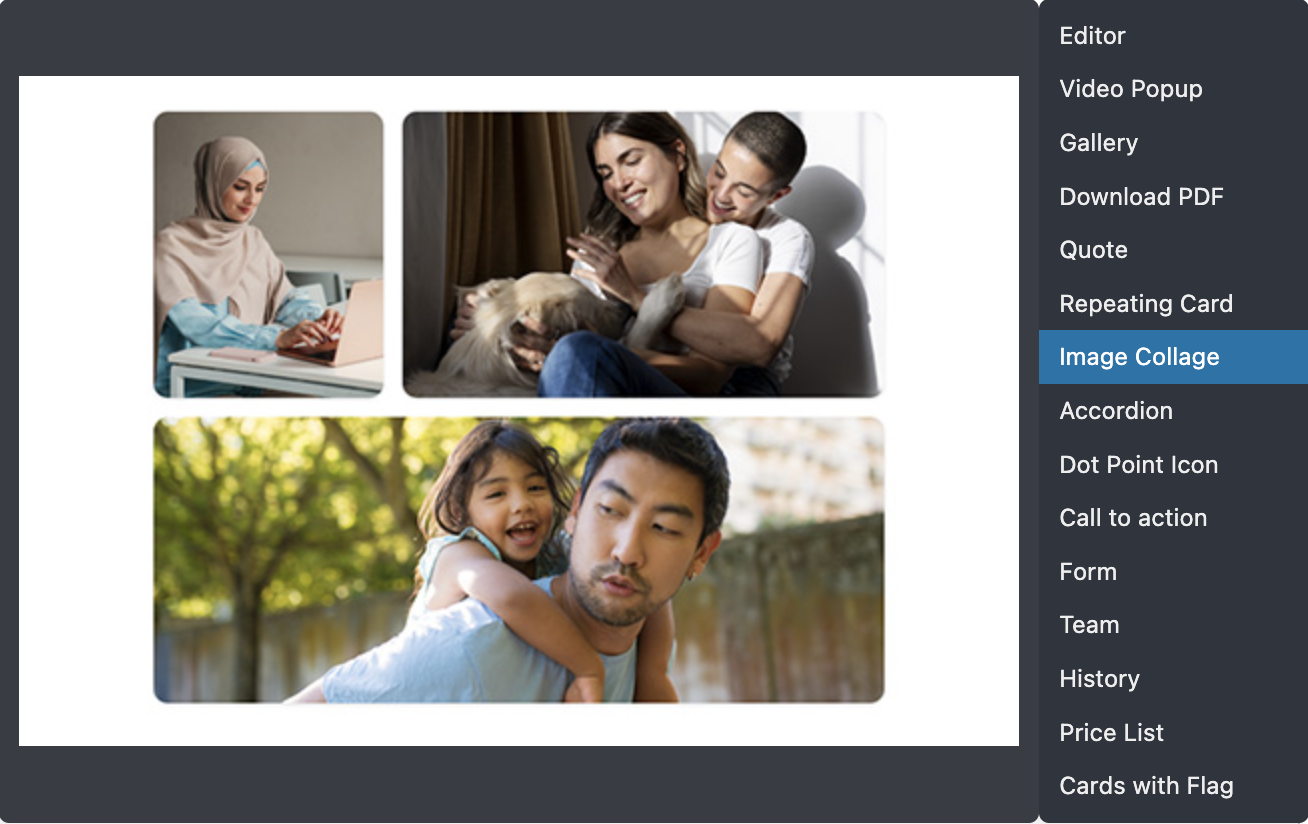
Use the Add + button to add a block from your library.
You can delete a block by clicking on the – Icon at the top of a block.

You can re-order blocks by dragging them from the top bar.

When you have finished adding or editing content, Press the Publish/Update button to save your changes.
Create a new campaign
Click Pages in the side menu.
Click Add new page at the top of the screen.
At the top of your page, add a Page Title for your campaign.
Under the Page Attributes on the right hand side, select the Campaign Page template.
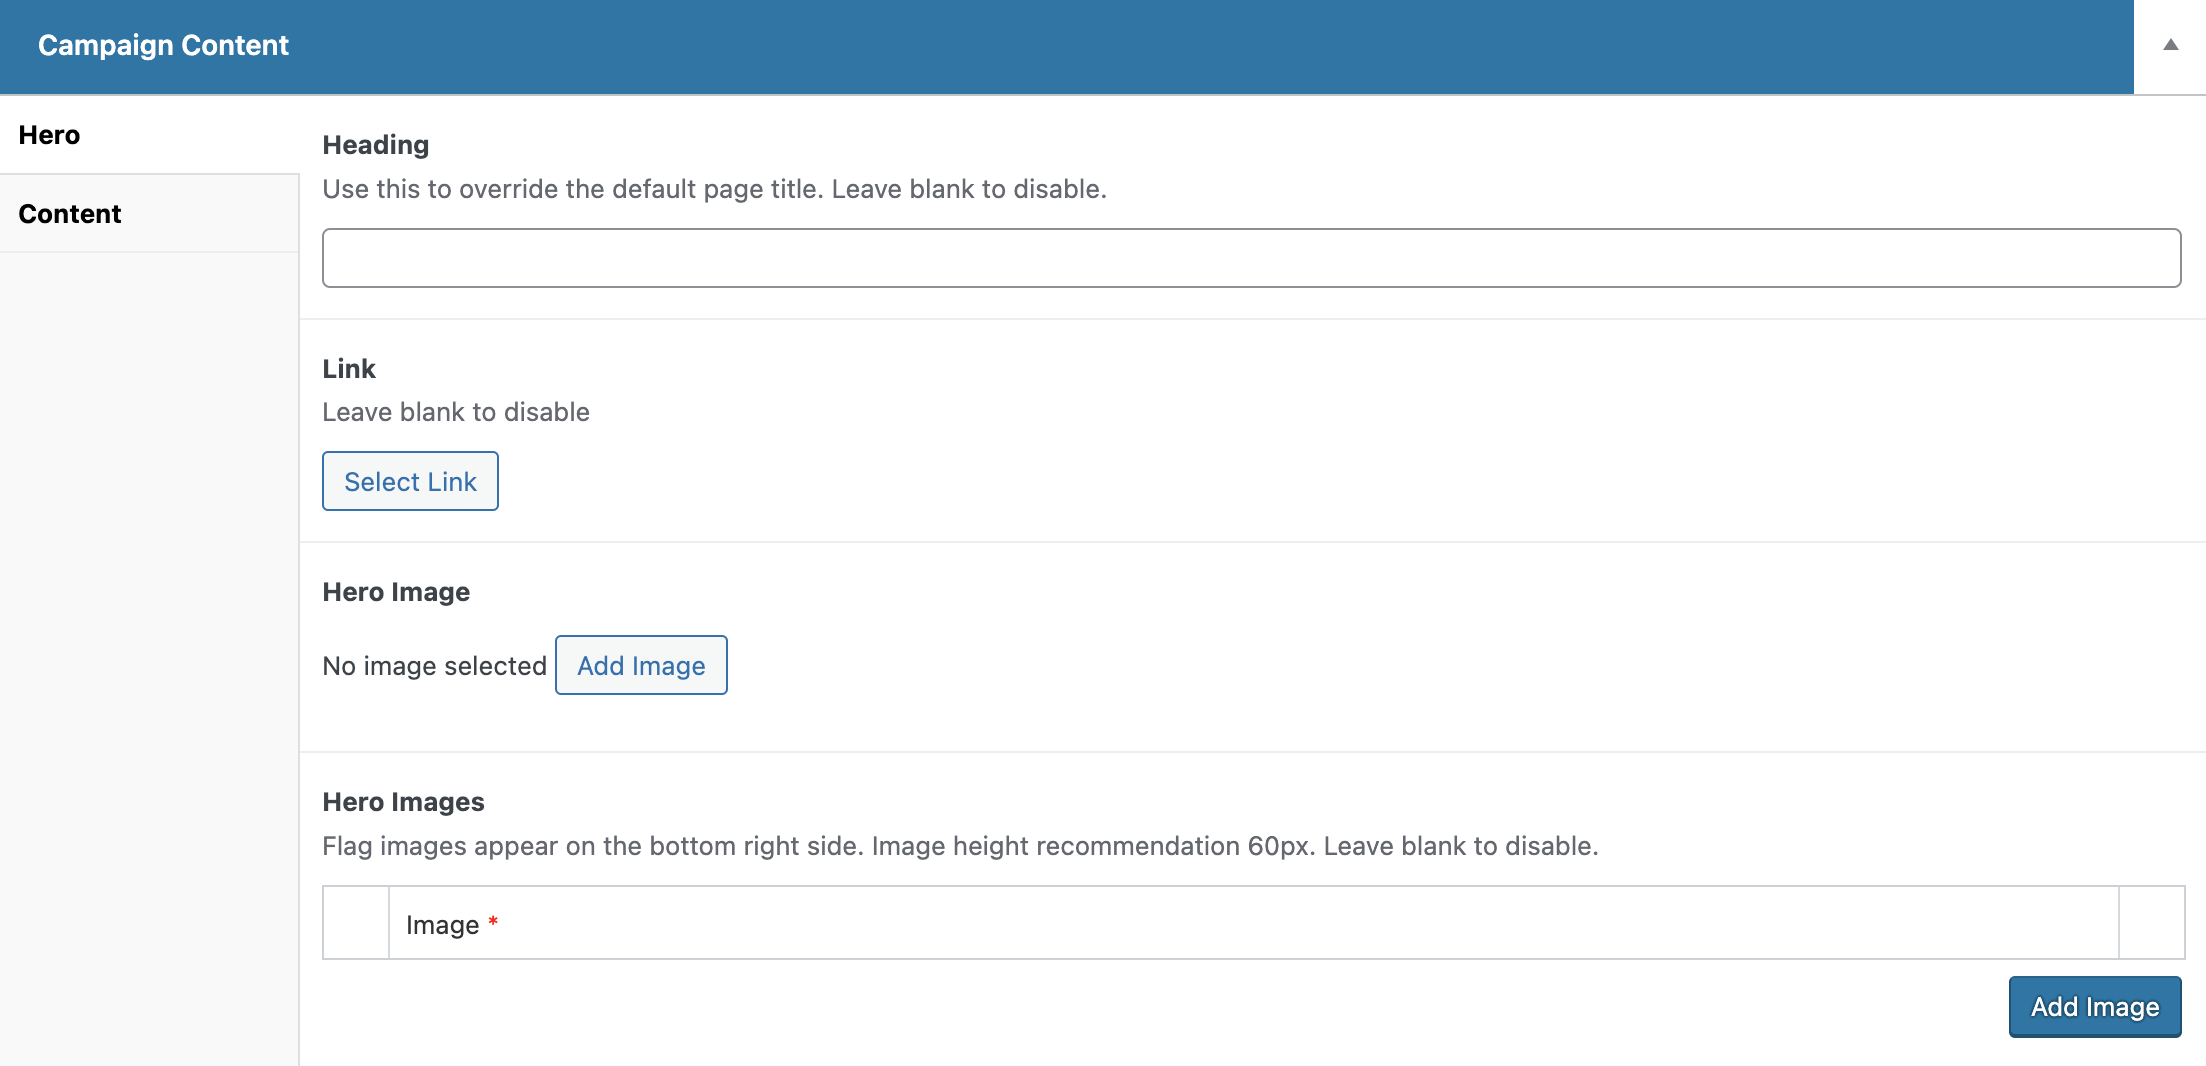
Under the Campaign Content, you can add a feature image, button link and flag images in the Hero Tab.
Under the Campaign Content, you can add content blocks by clicking Add + and selecting from the library.

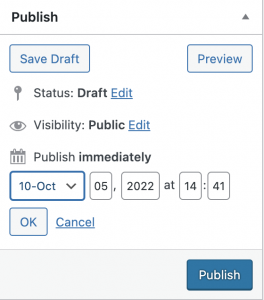
You can Publish your campaign by clicking Publish.
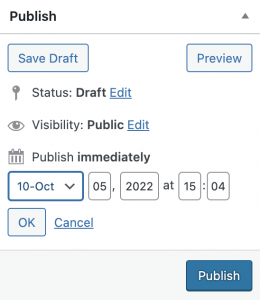
You can also schedule your campaign to publish later by clicking Edit next to Publish Immediately, selecting a date and time and clicking Schedule.
To delete a campaign, hover on Pages in the side menu and select All Pages. Find your campaign page in the list and hover on it to click Trash.
To disable your campaign page but save it for another time, hover on Pages in the side menu and select All Pages. Find your campaign page in the list and hover on it to click Edit. Change the Status from Published to Draft, and click Update.
Feature a current campaign on the home page
Hover on Pages in the side menu and select All Pages.
Find the ‘Homepage – Front Page’ by browsing the list or using the search, and then hover on it to press Edit.
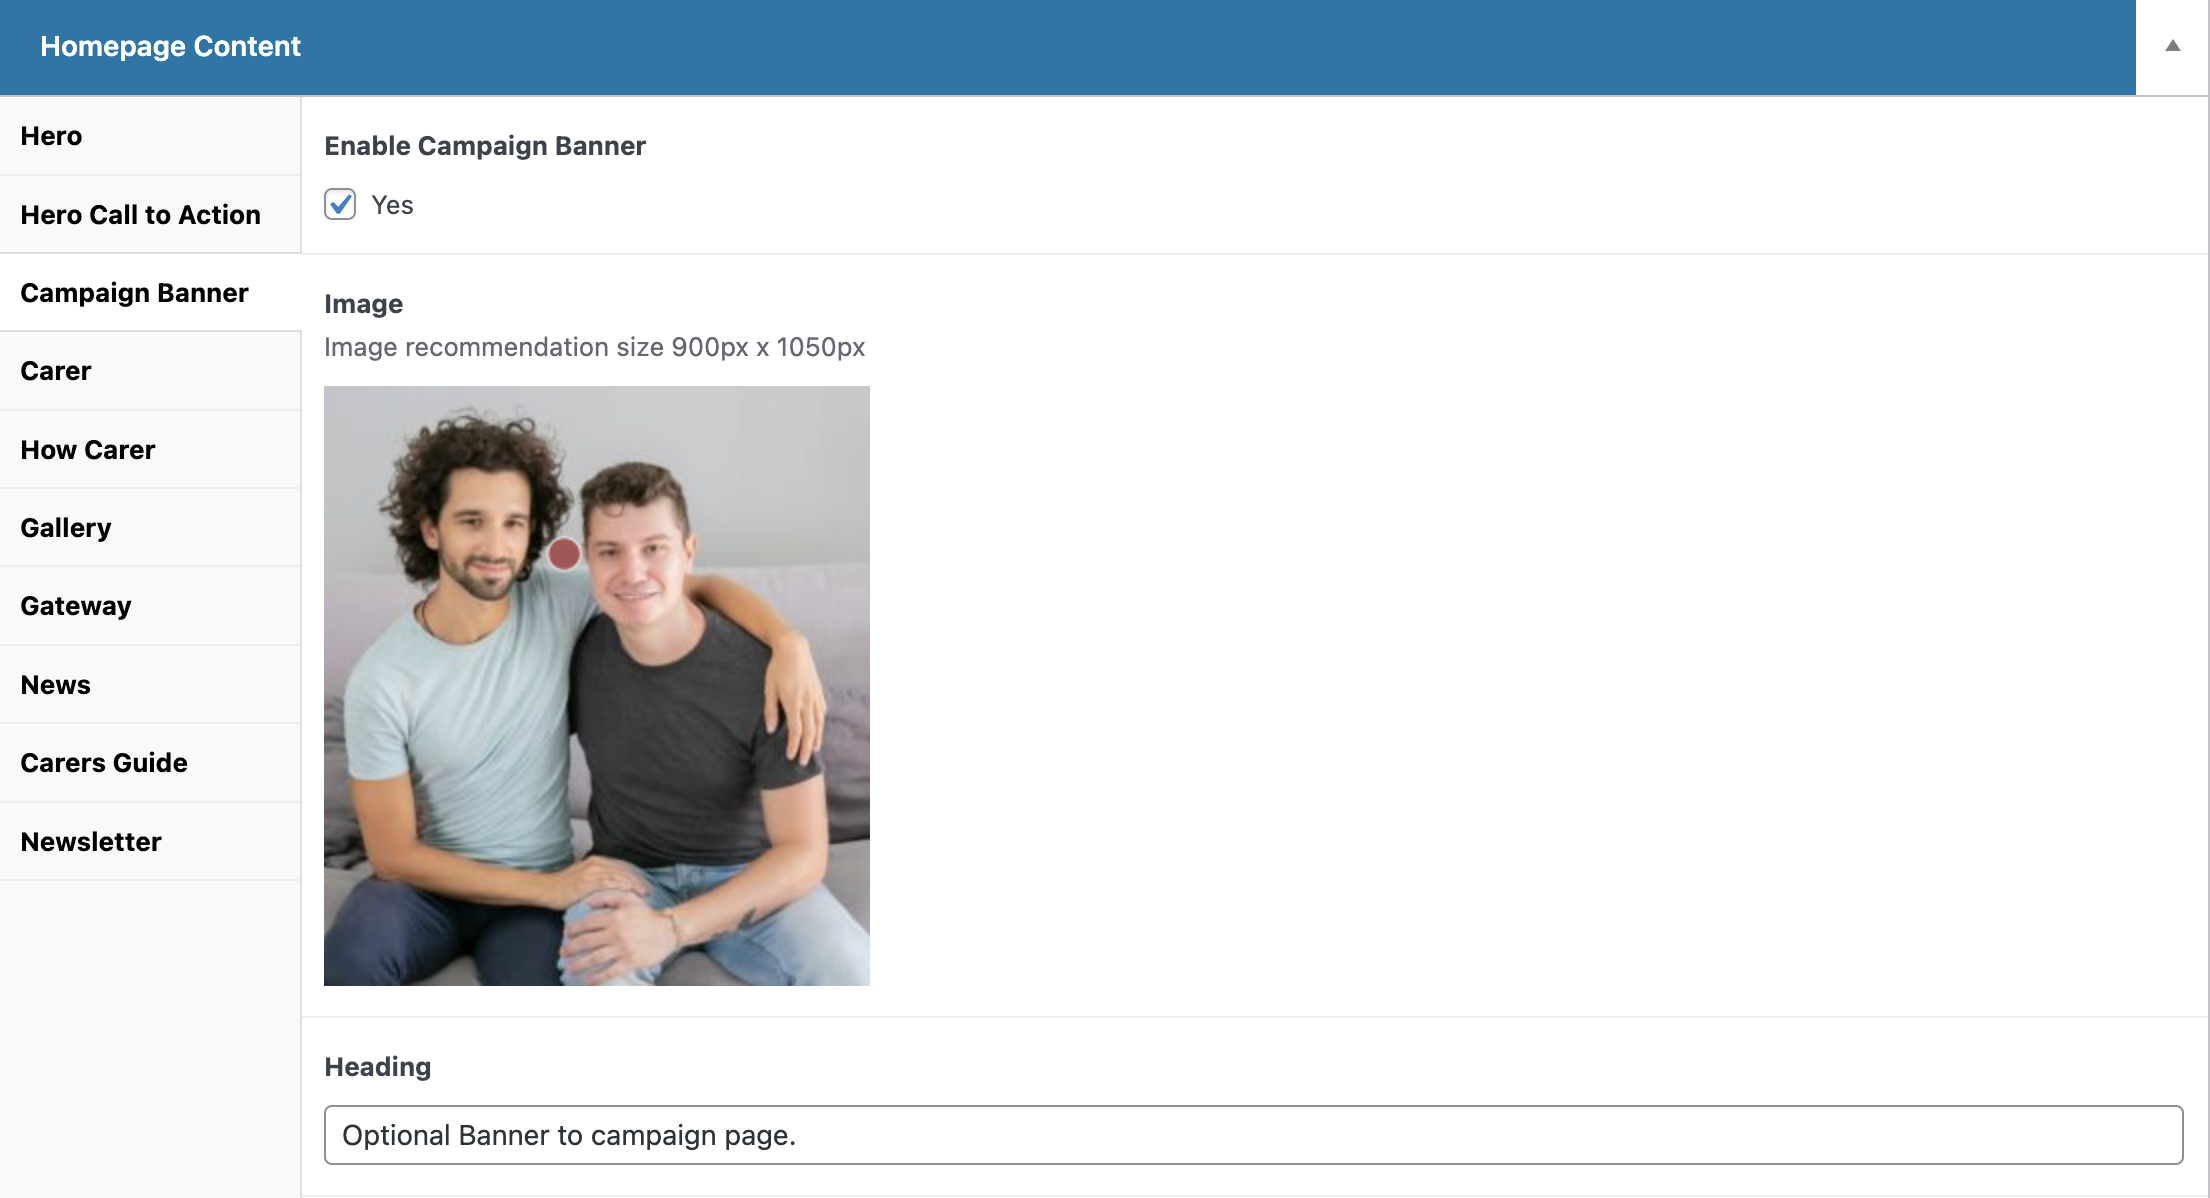
Under Homepage Content, navigate to the Campaign Banner tab.
Under this tab, you can enable the campaign section, and then a feature image, heading, description and button link to the relevant campaign.
Click Update on the right hand side to save your changes.
Please note, we have made this section manual so that you can use it for featured items other than campaigns. For example, you may need more gardeners, so you could build the content around that goal and then link to a contact page.
Enable or disable the alert banner
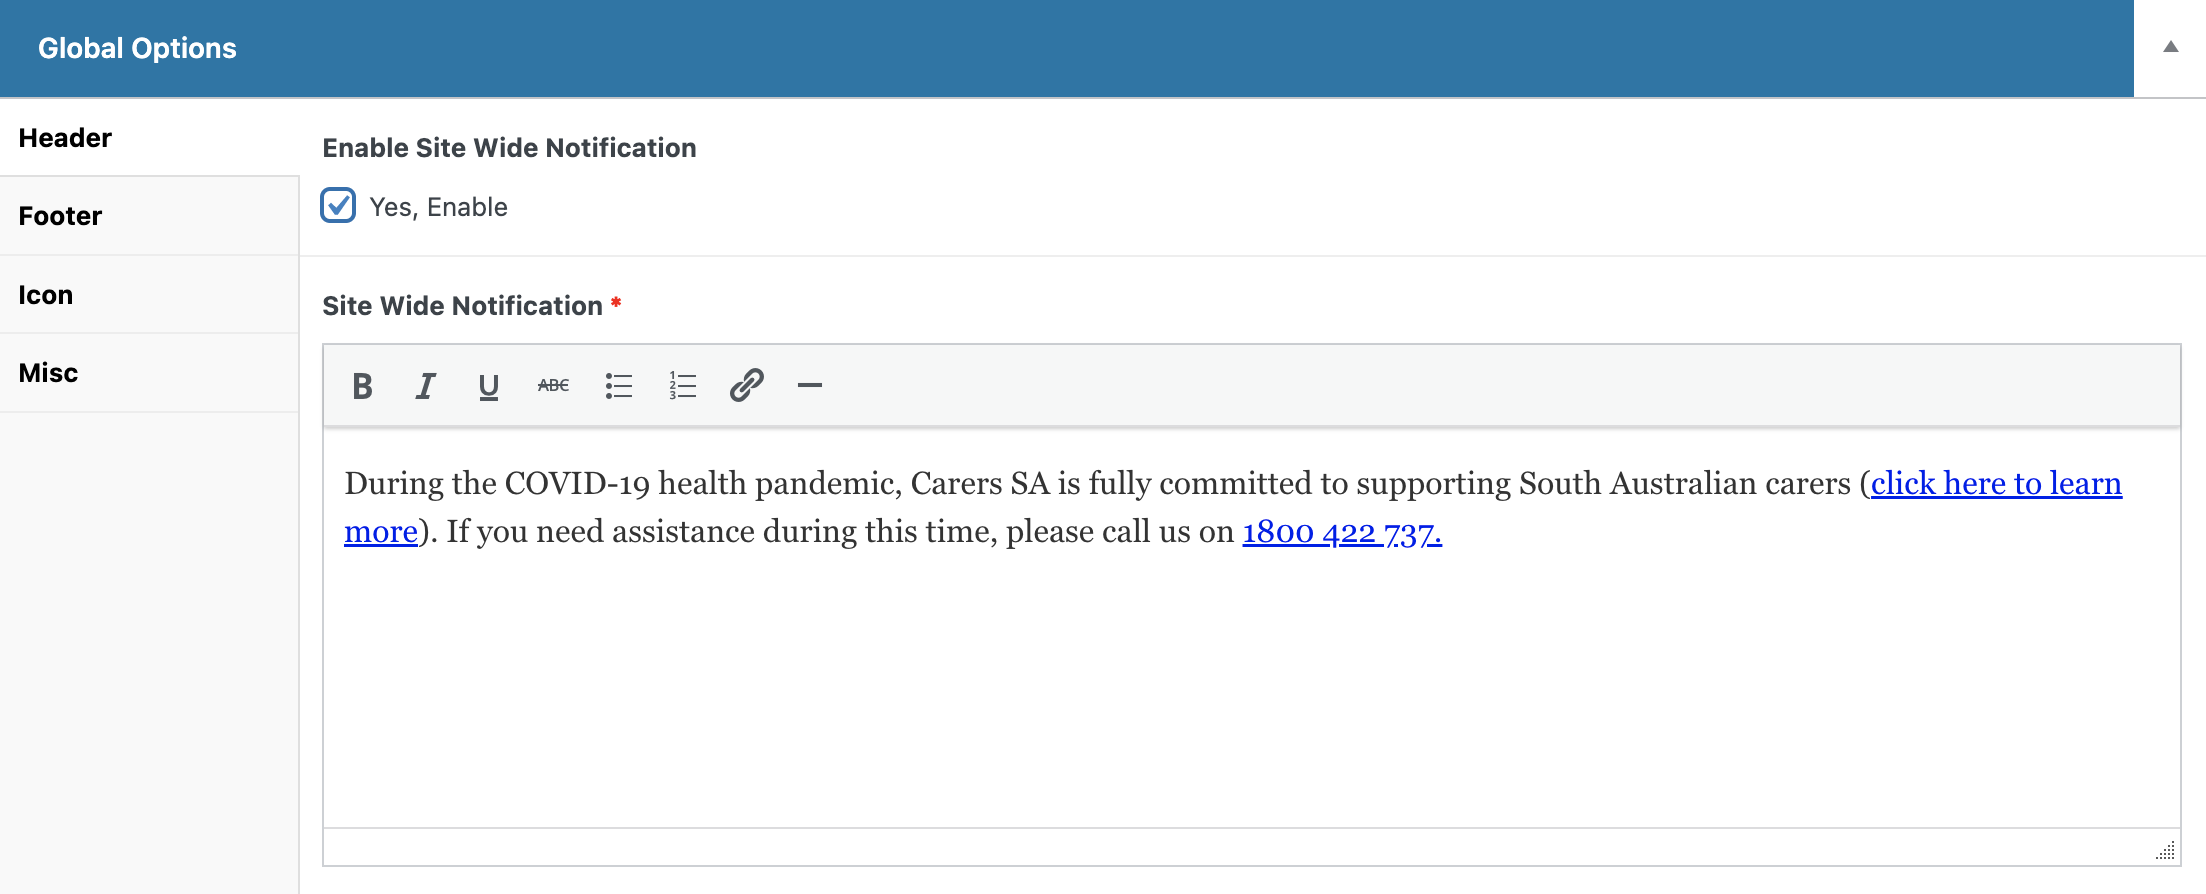
Click Global Options in the side menu.
In the Header tab, you can enable the alert and enter your message with relevant links.
Click Update to save this alert.
To disable an alert, you will need to navigate back to this section and uncheck the enabled checkbox.
Add or change the page icons in the menu
Hover on Appearance and click Menus.
From here, hit the down arrow on the page you want to edit the icon for.
Under Icon, click the + Button to bring up the icon selector.
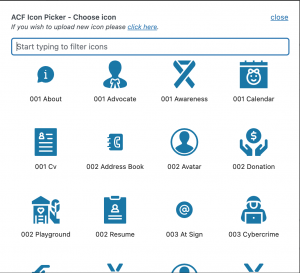
You will be presented with a pop-up where you can select an icon.
After you have selected an icon, click Save Menu on the bottom right to save your changes.
Please note, If you have set an icon for a page when creating that page, changing the icon in the menu settings will override the original icon.
If you need more icons, you can look for icon packs at www.flaticon.com and then contact us at kwpx to have them uploaded to your icon selector.
Create a new news article
To create a news article, hover on Posts in the side menu and click Add New.
From here, name your news article at the top of the page in the Add Title section.

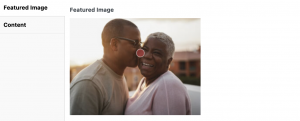
In Post Content, add a feature image under the Feature Image tab.
Ensure that this image is a full coloured image and does not include any text.

You can click on a point of interest within the image to set a hotspot. This will ensure that this point of the image is centred if the image is cut smaller on smaller devices. This point is represented by a red dot, the dot will not show on the live website.
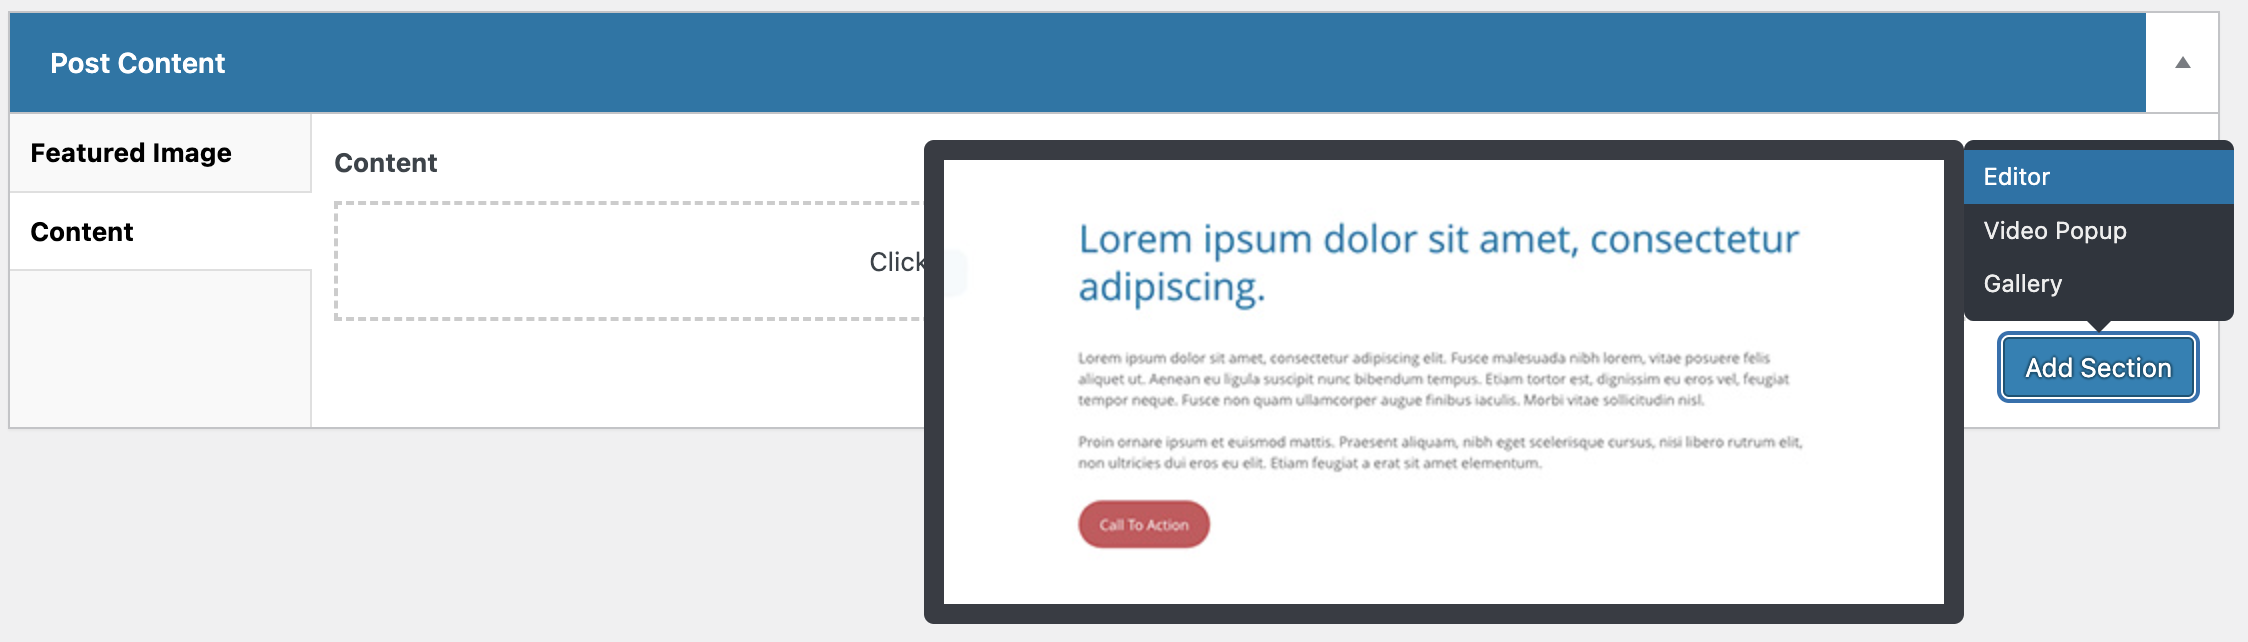
In Post Content, content blocks under the Content tab by clicking Add Section.
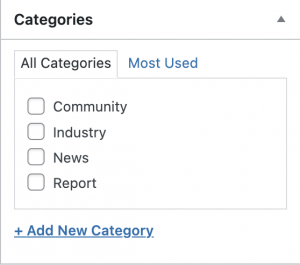
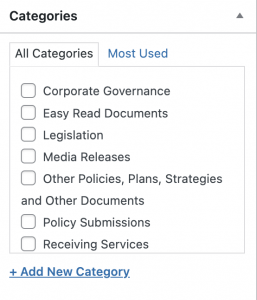
You can tag your article with a category under the Categories section on the right.
When finished, you can publish your article immediately by clicking Publish.
You can also schedule a release by clicking edit next to the publish time, and then setting a date and time and click Schedule.
To delete a news post, hover on Posts in the side menu and click All Posts. From here, you can hover on an article and click Trash.
To remove a news article from the website but keep it in the backend, hover on Posts in the side menu and click All Posts. Hover on the article and click Edit, then change the Status from Published to Draft, and click Update.
Create a new resource
To add a new resource, hover on Resources in the side menu and click Add New.
Add a Resource Title at the top of the page.
Select the Resource Type from the list.
Add a Resource Description if required.
If the resource is a PDF, click Add File under PDF File to open the media library. From here, you can select a previously uploaded PDF or drag the relevant PDF from your computer into the container. Click Select to add this file.

If the resource is an external link, paste the relevant link into the provided field.

Under Categories, select a category or add a new category for your resource.
Click Publish to post your resource to the website.
Create a new brochure
To add a new brochure, hover on Brochures in the side menu and click Add New.
Add a Brochure Title at the top of the page.
Add a Description if required.
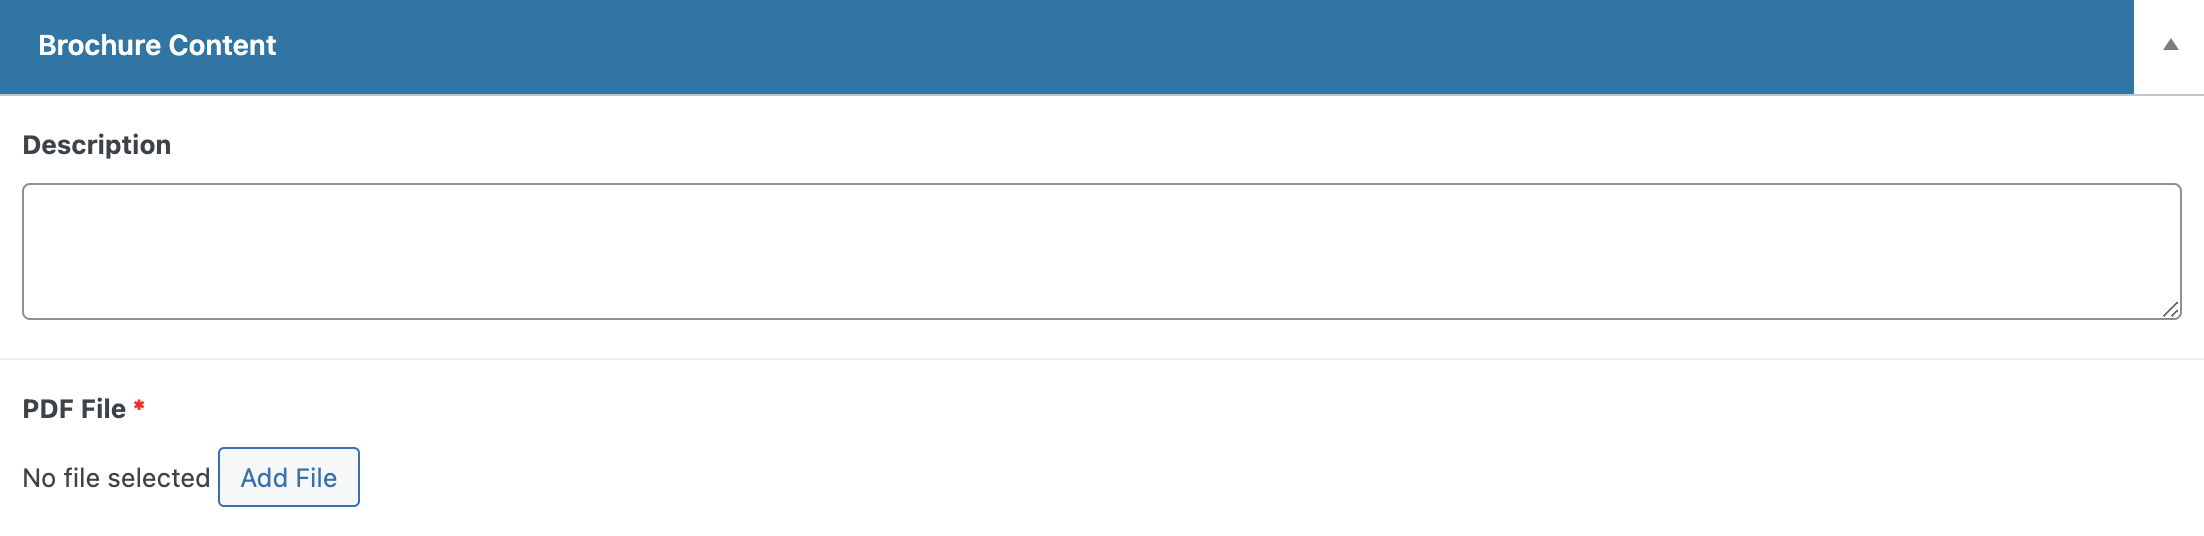
click Add File under PDF File to open the media library. From here, you can select a previously uploaded PDF or drag the relevant PDF from your computer into the container. Click Select to add this file.
Under Categories, select a category or add a new category for your resource.

Click Publish to post your brochure to the website.
Import events from Eventbrite
Hover on WP Event Aggregator in the side menu and click Eventbrite Import.
Enter the following code into the Eventbrite Event IDs: 428227900177

Click Import Event to import events from Eventbrite.
You can make further changes to imported events by clicking on WP Events in the side menu, then hovering on an event and clicking Edit.
Add or change navigation items in the menu
Hover on Appearance in the side menu and click on Menus.
To add a new page to the menu, find the newly created page from the Add Menu Items panel on the left. You can find your page by viewing the Most Recent pages, viewing All Pages or Searching for pages.
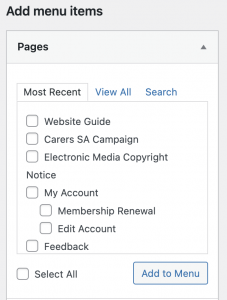
Once you have found your new page, click on the page to check it and then click the Add to Menu button.
The page will be added to the bottom of the Menu Structure, so you will need to scroll down to the bottom of the list.
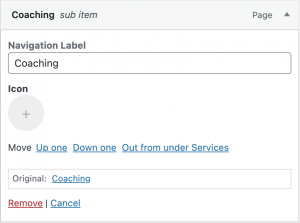
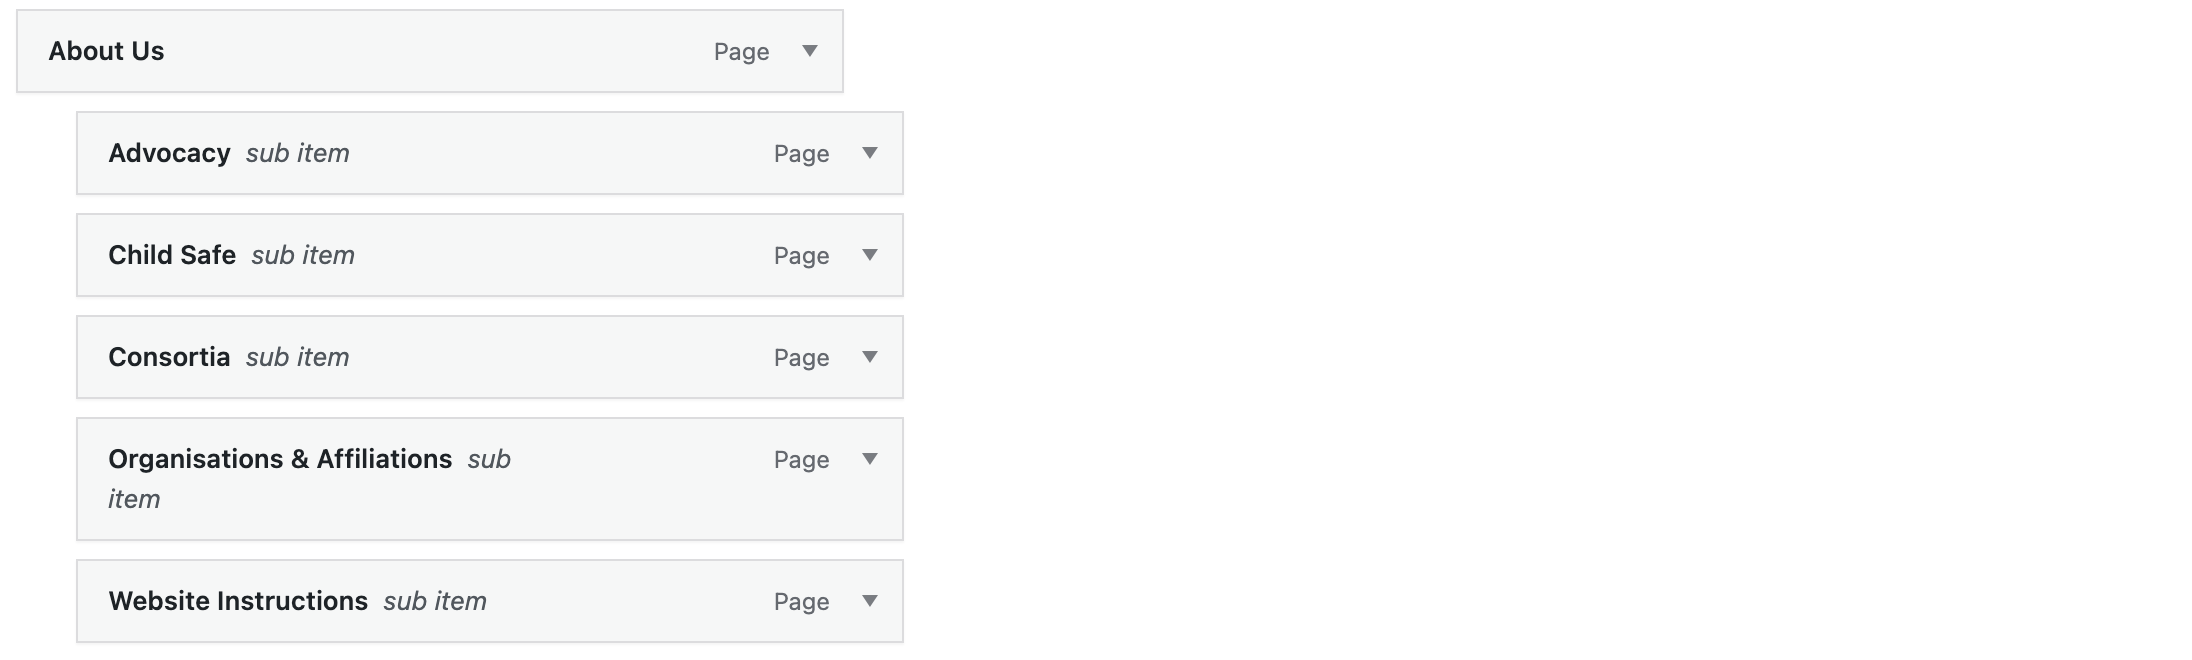
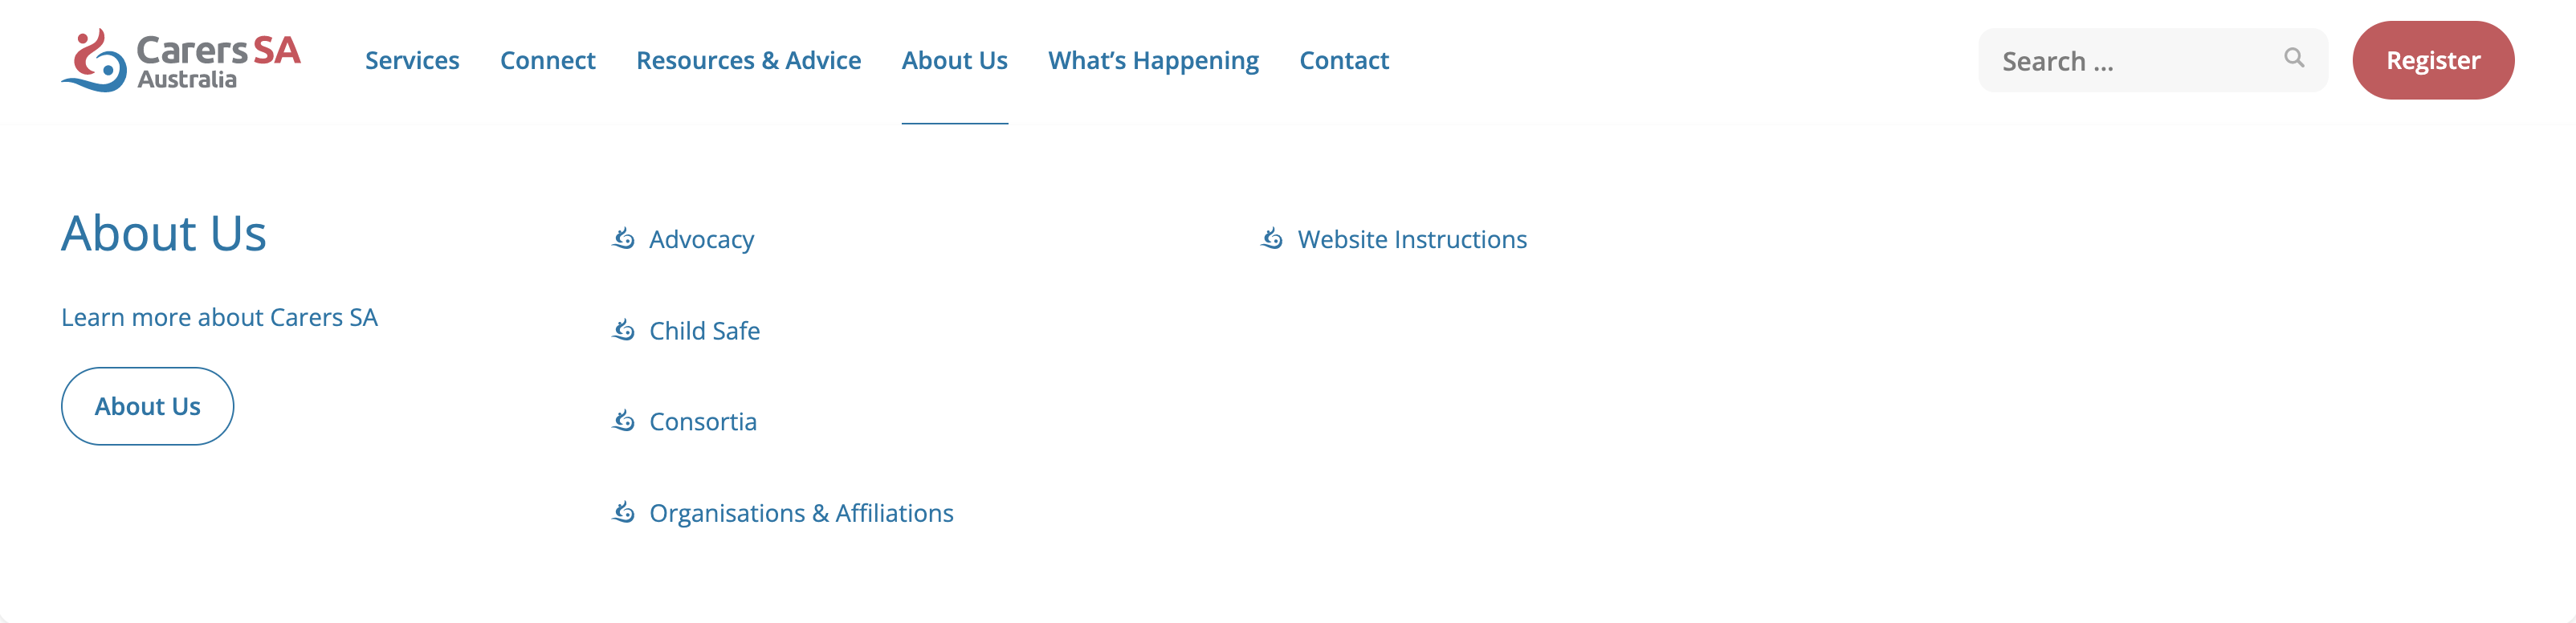
Once you find your page, you can drag underneath the menu item you would like to appear under, for the example below I have dragged Website Instructions underneath About Us.
After you click on Save Menu, your pages will appear in the menu of your website.
To remove a menu item, you can click on the drop-down arrow of that page, and then click Remove.
Please not that removing a page from the menu will not delete the page, but only hide it. You can delete pages from the Pages tab in the side menu.
Add a new user to your WordPress backend
Hover on Users in the side menu and click Add New.
You will need to fill the Username and Email fields.
You can also select their access level from the Role drop-down.
Make sure ‘Send User Notification’ is checked, and then click Add New User.
From here, the user will receive an email prompting them to create a new password for their account. If they cannot find the email, please ask them to check their junk folder.
To delete a user, hover on Users and select All Users. From here, you can hover on a user and click Delete.
Create and edit forms
Click on Forms in the side menu.
From here, you can click Add New to create a new form, or hover on an existing form and click Edit.
You can create forms using:
Standard Fields ie. Single lines, checkboxes, drop-downs and other simple fields.
Advanced Fields ie. Address, email, phone number, file upload and other advanced fields.

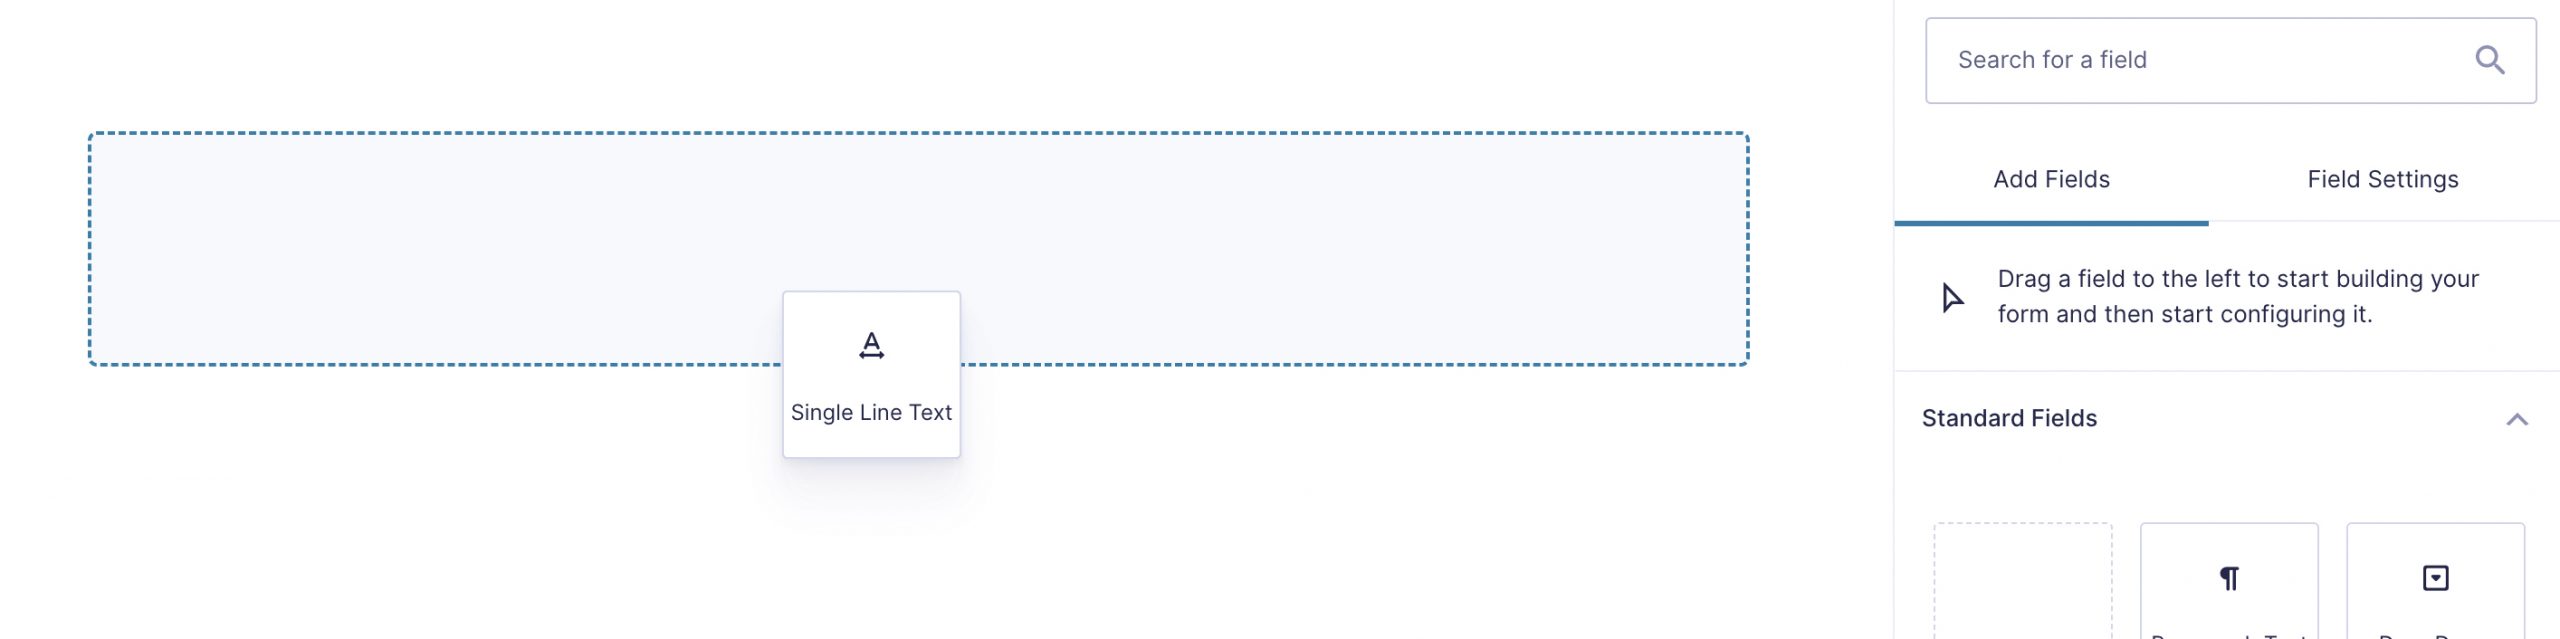
To start creating a form, drag a field from the right menu into the form builder.
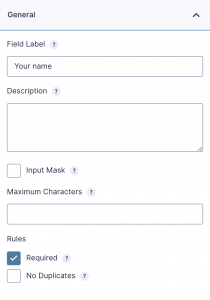
Click on the field to edit it’s settings. You can change the field name, placeholder (Default is ‘Type here…’) and select whether the field is required or not.
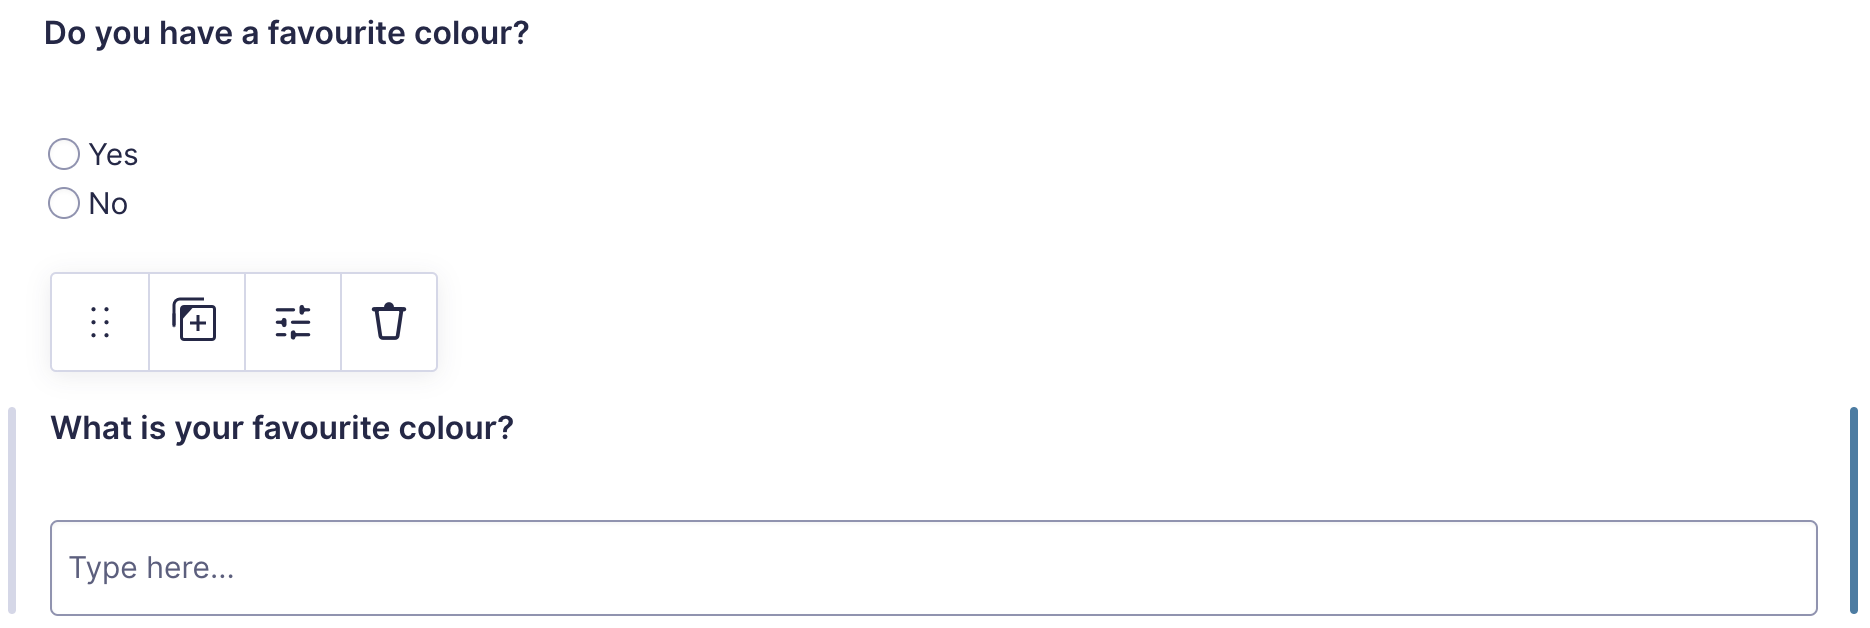
To set conditional logic (a field only appears when another field has a certain answer), you can use the conditional logic settings of the field you want to appear. For the example below, I created a radio button field asking the user if they have a favourite colour, with a follow up question asking what that colour is based on their answer.
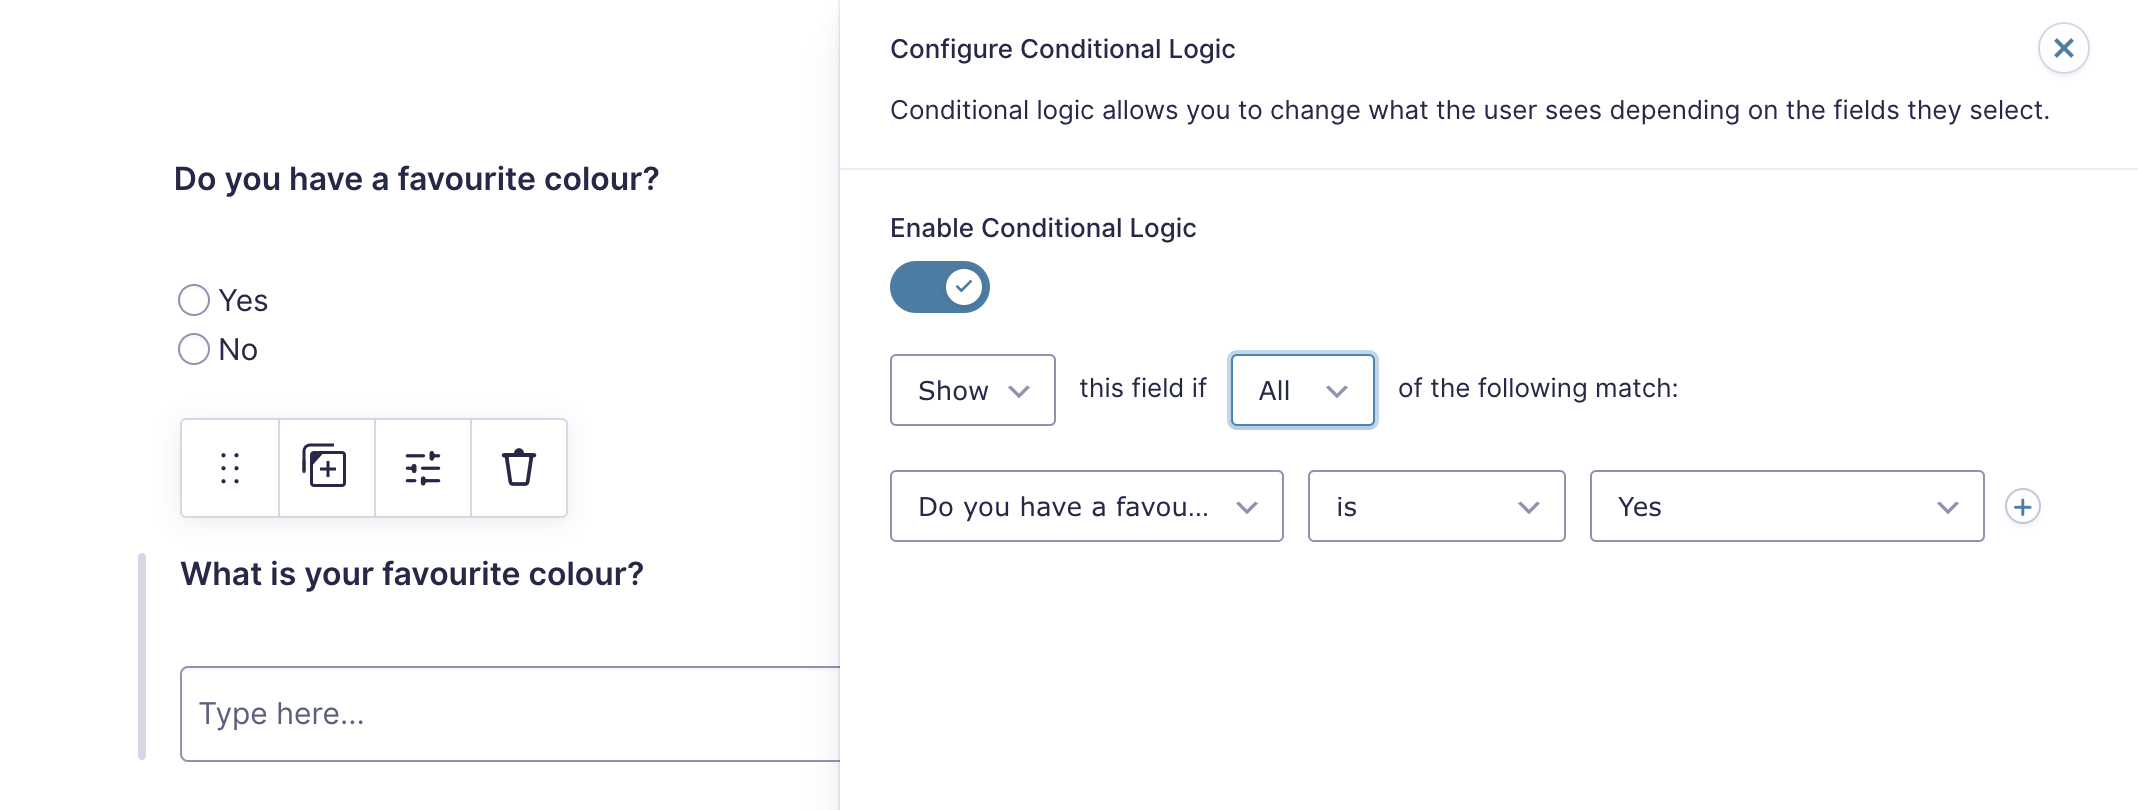
For the condition question (What is your favourite colour?), I have selected the Conditional Logic option from the bottom of the Field Settings of the selected field.
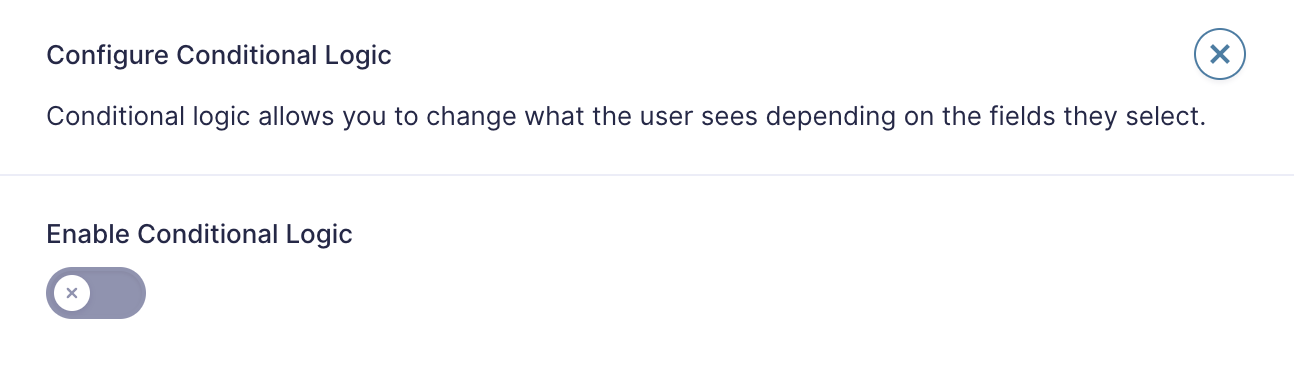
Active the Enable Conditional Logic tab, and then set the logic using the options. For the example below, I told the logic to only ask the user that their favourite colour is if they select ‘Yes’ to having a favourite colour.
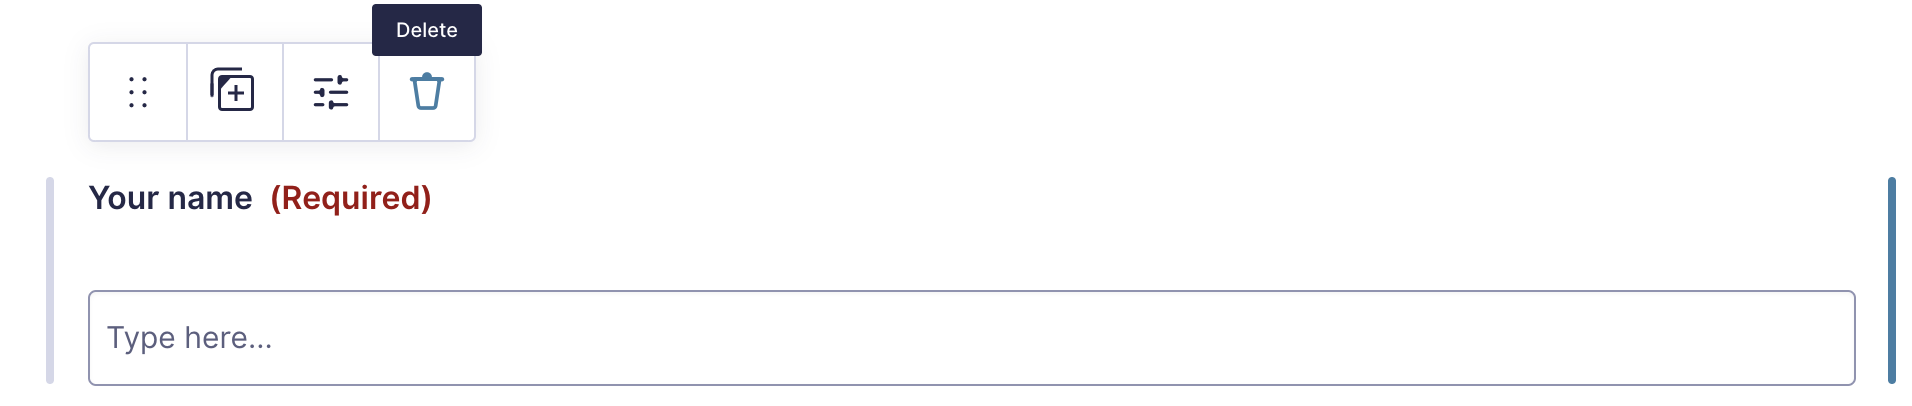
To delete a field, hover over the field and click on the trash bin icon.
Once you have finished creating your form, click Save Form.
To delete a form, click on Forms in the side menu, and then hover on a form and click Trash.
Edit form confirmations and notifications
To edit the email confirmations and alerts, click on Forms in the side menu and hover on a form.
Click on either Confirmations or Notifications depending on what you want to edit.
Confirmations are sent to the user to confirm that their enquiry has been sent.
Notifications are emails sent to a designated received on the business end to alert you of a new enquiry.
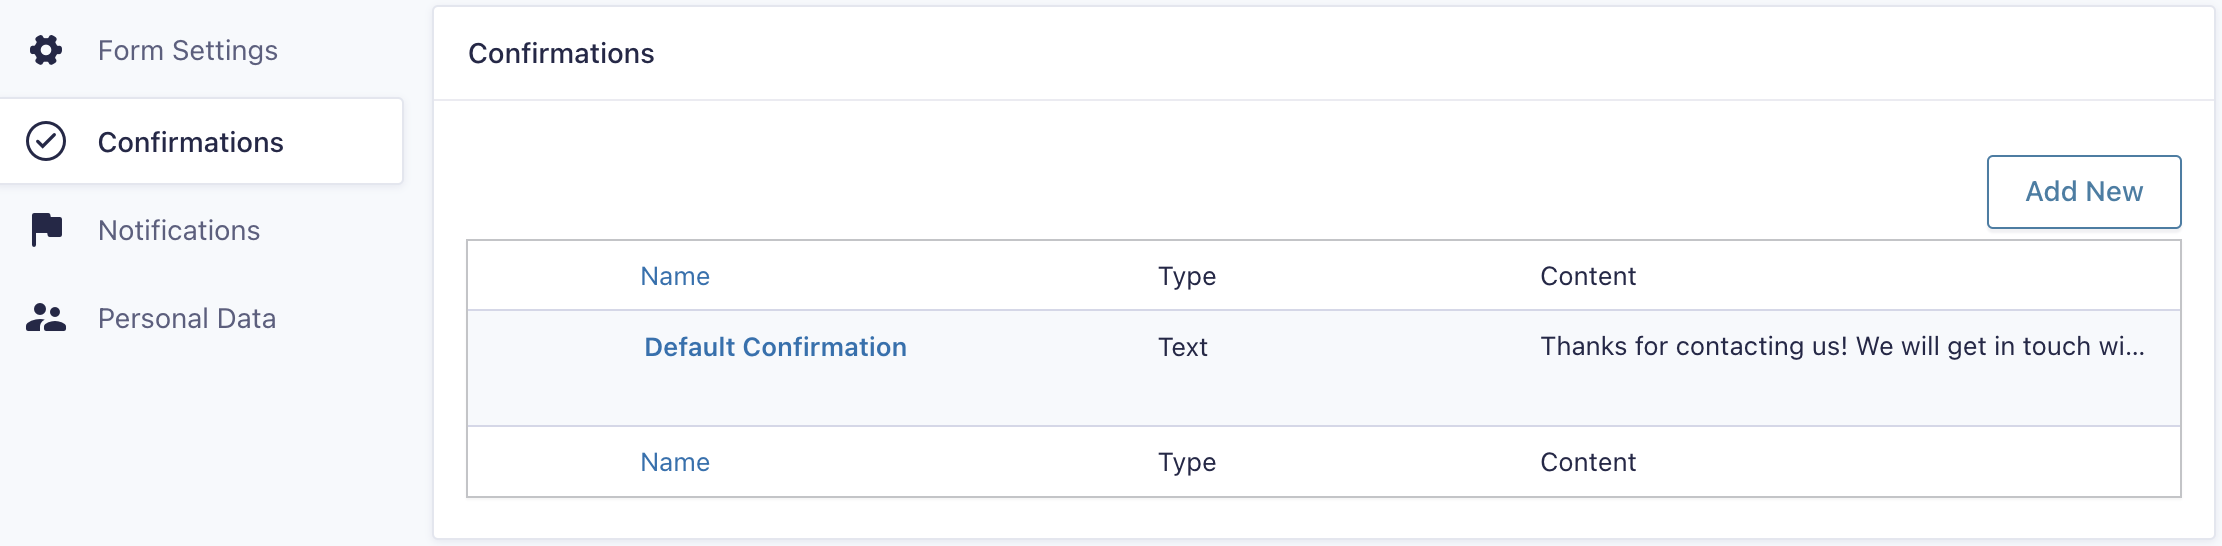
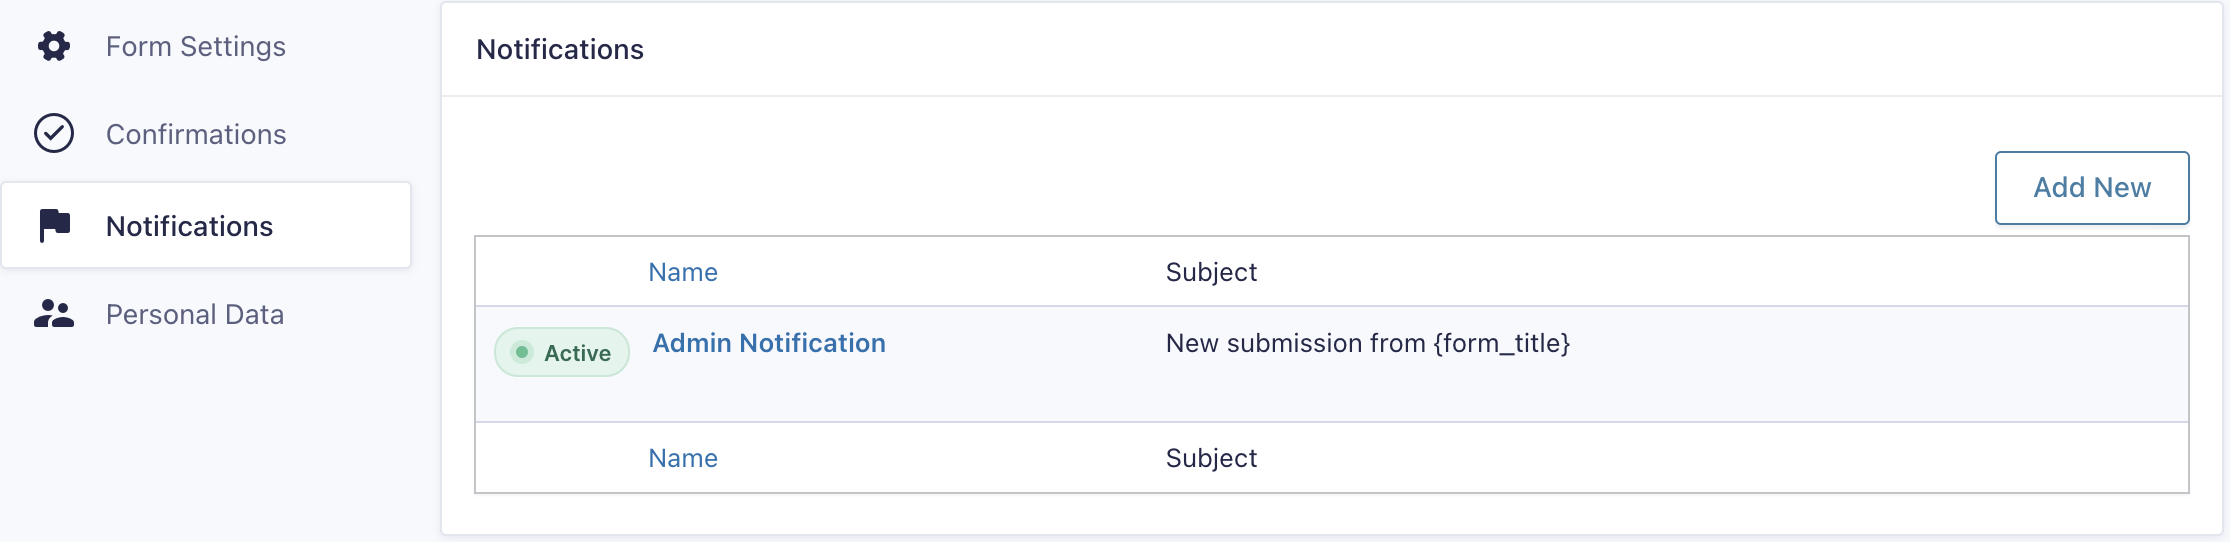
You can hover on the Admin Notification or Default Confirmation and click edit to change their contents.
Click Save/update to save any changes made to these emails.
Image Resolutions
All image resolutions are listed in the upload field for that specific image. When creating a replacement image, look at the field you are going to upload it into and check the correct minimum resolution listed.
To ensure your website is performing fast, it’s best to resize and optimise your images before uploading them!
The website linked below will compress images for you, you can then re-download them and use them in your website.
Have a question?
Get in touch with our support team at support@kwpx.au or call us on 08 8217 9100.